Crafting the Mystical Pegasus 3D Shadow Box: A Guide to Precision and Presentation
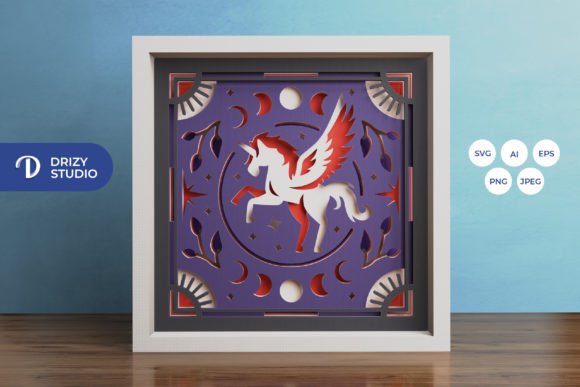
The allure of layered paper art lies in its ability to transform flat sheets into immersive, three-dimensional scenes. Among the most captivating designs available to crafters today is the Mystical Pegasus 3D Shadow Box. This intricate template features a mythical winged horse soaring through clouds, creating a sense of depth and wonder that static images simply cannot achieve. Whether you are a seasoned papercraft artist or a beginner looking for a rewarding weekend project, understanding the nuances of this specific design is crucial for achieving a professional finish.
Many enthusiasts dive into digital cutting projects with high expectations but often overlook the technical details that separate a good result from a great one. The difference usually isn’t skill—it’s preparation. By addressing common pitfalls before you even open your design software, you can ensure your final piece is structurally sound, visually striking, and worthy of display or gifting.
Understanding the File Formats and Their Limitations
One of the most frequent misunderstandings involves the variety of file formats provided with the Mystical Pegasus 3D Shadow Box template. You will typically receive files in AI, EPS, PNG, SVG, and JPEG formats. While it might be tempting to grab the first file that opens, choosing the wrong format for your tool can lead to frustration.
If you are using a digital cutting machine like a Silhouette or Cricut, the SVG file is your primary asset. It contains vector paths that tell the blade exactly where to cut. However, a common mistake is resizing these vectors incorrectly. The original design is optimized for a square format of 714 x 714 pixels, which translates to a physical size of approximately 20.32 x 20.32 cm. If you resize the SVG without locking the aspect ratio, the layers will no longer align. The Pegasus might look stretched, and the registration marks won’t match up during assembly. Always ensure you maintain the proportional dimensions when scaling the design up or down.
For those who prefer manual cutting with an art knife or scissors, the high-resolution PNG or JPEG files serve as excellent visual guides. However, remember that these are raster images. Printing them at a size larger than intended can result in pixelation, making it difficult to see fine details like the feather textures on the Pegasus wings. Stick to the recommended print sizes to keep edges crisp.
The Critical Role of Layer Alignment and Depth
This particular shadow box consists of six distinct layers. The magic of the 3D effect relies entirely on the precise spacing between these layers. A prevalent error among beginners is using too much adhesive or uneven spacers, which causes the layers to bow or warp. When the paper bends, the illusion of depth is broken, and the image looks cluttered rather than dimensional.
To avoid this, use consistent spacers. Foam tape strips are ideal because they come in uniform thicknesses. If you are using glue, apply it sparingly and only to the designated contact points indicated in the template. Another overlooked detail is the order of assembly. It is tempting to glue all layers together quickly, but you should dry-fit the entire stack first. Place the layers in order without adhesive to check the alignment. This step allows you to catch any misprints or cutting errors before they become permanent.
Lighting: Enhancing the Mystical Atmosphere
The product description highlights the option to create a lightbox by adding LED strips. This is where many creators miss an opportunity to elevate their work. Simply sticking LEDs behind the back layer often results in hotspots—bright spots that wash out the details of the paper cutouts. Instead, consider diffusing the light.
Use a thin sheet of vellum or tracing paper behind the final layer to soften the glow. Position the LED strips along the inner edges of the frame rather than directly behind the central subject. This creates a halo effect that illuminates the Pegasus from behind, enhancing the mystical vibe without overpowering the delicate paper cuts. Ensure your power source is accessible; hiding the battery pack or USB cable within the frame design requires planning before you begin assembly.
Material Selection and Color Accuracy
The note accompanying the template warns that final product colors may vary due to lighting and paper choice. This is not just a disclaimer; it is a critical design consideration. The preview images are digital representations. If you choose a paper stock that is too thick, it may not fit within standard frame depths. If it is too thin, it may tear during the weeding process or sag over time.
Cardstock between 160gsm and 250gsm is generally ideal for this type of project. It holds its shape well but is still flexible enough for intricate cuts. Regarding color, if you aim for a monochromatic look, test your printer settings on a scrap piece first. Shadows and highlights in the design rely on subtle tonal variations. Using a single solid color for all layers can flatten the image, removing the depth that the shadows are meant to create. Consider using slightly different shades of the same hue for each layer to naturally enhance the 3D effect.
Framing and Final Presentation
Once assembled, the Pegasus 3D Light Box needs a proper home. A common oversight is choosing a frame that is too shallow. With six layers plus spacers and potentially LED wiring, the depth requirement is significant. Measure your assembled artwork carefully before purchasing a frame. Deep-set shadow box frames are specifically designed for this purpose.
Additionally, consider the background. While the template includes a back layer, adding a reflective mirror backing can amplify the light and create an infinite depth effect, though this changes the aesthetic from mystical to modern. For a traditional look, a matte black or deep navy background helps the white or light-colored paper layers pop, emphasizing the silhouette of the Pegasus.
Creating this piece is more than just following instructions; it is about understanding how light, shadow, and material interact. By paying attention to file integrity, layer spacing, lighting diffusion, and material weight, you transform a simple download into a stunning work of art. Whether kept for personal enjoyment or gifted to a loved one, a well-executed Mystical Pegasus 3D Shadow Box stands as a testament to patience and precision.