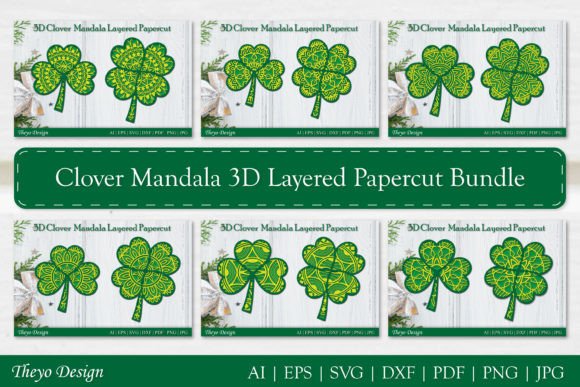
Mastering the Clover Mandala Layered Papercut Bundle for Flawless 3D Art
There is a distinct satisfaction in watching a flat sheet of paper transform into a dimensional piece of art. The Clover Mandala Layered Papercut Bundle offers a sophisticated way to achieve this, blending intricate geometric patterns with organic floral motifs. However, many crafters rush into cutting without fully understanding the nuances of layered design. This haste often leads to wasted materials, frustration, and a final product that lacks the crisp definition seen in professional showcases. Whether you are a seasoned entrepreneur selling handmade decor or a hobbyist looking to elevate your home aesthetics, understanding the technical and artistic requirements of this bundle is essential for success.
Understanding the Complexity of Layered Designs
The primary appeal of the Clover Mandala 3D Layered Papercut lies in its depth. Unlike single-layer silhouettes, this design relies on the precise stacking of multiple elements to create shadows and perspective. A common misunderstanding among beginners is assuming that all layers are created equal. In reality, each layer serves a specific structural purpose. The base layers provide stability, while the upper layers introduce detail and visual interest.
When you download the ZIP file, you are not just getting a picture; you are receiving a toolkit. The included formats—AI, PDF, EPS, JPG, PNG, SVG, and DXF—are not redundant. They serve different workflows. For instance, using a JPG for cutting is a frequent error that results in pixelated edges and poor machine recognition. Always prioritize vector formats like SVG, AI, or EPS for cutting machines, as they maintain infinite scalability and clean lines regardless of size.
Common Pitfalls in Material Selection and Preparation
One of the most costly mistakes creators make is underestimating the importance of paper weight and texture. The Clover Mandala Layered Papercut Bundle features delicate connections between intricate shapes. If you use paper that is too thin, the layers may tear during weeding or fail to hold their shape when stacked. Conversely, cardstock that is too thick can cause bulkiness, making it difficult to adhere layers evenly without visible glue bumps.
- Too Thin: Standard printer paper (20 lb) lacks the rigidity needed for 3D structures. It warps easily and tears at narrow points.
- Too Thick: Heavyweight cover stock (over 80 lb) can be difficult for some blades to cut cleanly, leading to jagged edges on complex curves.
- Wrong Texture: Highly textured papers can interfere with adhesive bonding, causing layers to shift over time.
A better approach is to test a small section of the design on your chosen material before committing to the full cut. Aim for a mid-weight cardstock (65–80 lb) that offers a balance of durability and flexibility. Additionally, ensure your paper is grain-aligned correctly if you are working with larger formats, as this affects how the paper bends and holds its form.
Navigating Software Settings for Precision
Having the right file is only half the battle; configuring your cutting software correctly is the other. Many users load the SVG cut file into their Cricut Design Space or Silhouette Studio and immediately hit "Make," ignoring critical settings. This oversight often results in incomplete cuts or excessive blade wear.
For the Clover Mandala 3D Layered Papercut, precision is paramount. Intricate mandala details require a sharp blade and appropriate pressure settings. If you notice that small interior pieces are not cutting through, do not simply increase the pressure blindly. Instead, check your blade for debris and perform a test cut. Adjusting the "Multi-Cut" setting to two passes is often more effective than increasing pressure, as it allows the blade to follow the path cleanly without dragging the paper.
Furthermore, ensure that your mat is clean and sticky enough to hold the paper firmly. Any shifting during the cut will ruin the alignment of the layers, making assembly nearly impossible. If you are using a older mat, consider using painter’s tape to secure the corners of your paper, providing extra stability without damaging the material.
The Assembly Process: Where Patience Pays Off
Assembly is where the magic happens, but it is also where many projects fall apart—literally. A frequent error is applying too much adhesive. Liquid glues can warp paper, while thick glue sticks create uneven surfaces that prevent layers from sitting flush. For the Clover Mandala Layered Papercut Bundle, precision adhesives like fine-tip glue pens or double-sided tape dots are superior choices.
Start from the bottom layer and work your way up. Use a light box or a bright window to help align the layers accurately. Misalignment by even a millimeter can disrupt the symmetry of the mandala, drawing the eye to the error rather than the beauty of the design. Take your time to center each piece before pressing it down. Once glued, mistakes are difficult to correct without damaging the surrounding layers.
If you do not have a cutting machine, you can still enjoy this design using an art knife. However, this requires a different set of skills. Ensure your knife blade is fresh; a dull blade will tear the paper rather than cut it. Work on a self-healing mat and rotate the paper, not the knife, to achieve smooth curves. This method is slower but offers a meditative quality that many crafters appreciate.
Maximizing Value and Versatility
When you purchase the Clover Mandala Layered Papercut Bundle, you are investing in versatility. The inclusion of multiple file formats means you can use the design across various platforms. Use the PNG for digital invitations or social media graphics, the PDF for printing high-resolution references, and the SVG for cutting. Do not limit yourself to paper; these files can be adapted for vinyl decals, wooden laser cuts, or even fabric appliques, provided you adjust the complexity for the material.
Entrepreneurs should note that layered papercut art commands a higher price point due to the labor involved. By mastering the techniques outlined above, you can produce consistent, high-quality pieces that justify premium pricing. Hobbyists can experiment with color combinations, using contrasting shades to highlight the depth of the 3D effect.
Final Checks Before You Begin
Before you start cutting, take a moment to review your setup. Check that your software is updated to handle the latest SVG standards. Verify that your blade is sharp and your mat is clean. Read through the instructions included in the ZIP file, as they may contain specific tips for this design. If you encounter any issues with the files, such as corrupted downloads or missing layers, do not hesitate to contact support. Most designers are willing to help resolve technical errors to ensure customer satisfaction.
The Clover Mandala 3D Layered Papercut is more than just a digital file; it is an opportunity to create something tangible and beautiful. By avoiding common mistakes in material selection, software configuration, and assembly, you can ensure that your final piece reflects the care and skill you put into it. Whether you are framing it for your living room or selling it at a local market, the result will be a testament to your craftsmanship.
Remember, creativity thrives on preparation. Take the time to understand the tools and techniques at your disposal. Ask questions if something is unclear, and do not be afraid to experiment. With the right approach, the Clover Mandala Layered Papercut Bundle can become a staple in your creative repertoire, offering endless possibilities for expression and decoration.